Bread is a staple of Greek cuisine. According to most Greeks, the very presence of bread is a sign of hospitality. This isn’t a new concept – the Ancient Greeks started valuing bread thousands of years ago and the tradition has continued.
So, what is Greek bread, exactly? The truth is, there are a few different types of breads that you can find in the cuisine. The most popular of these is the rustic and popular “country bread” that is found at just about every dinner table. Here’s a look at how this bread is made:
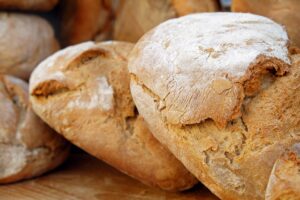 Recipe for Making Greek Country Bread
Ingredients:
1 cup warm water
1 packet (2 tablespoons) dry yeast
1 teaspoon sugar
2 tablespoons olive oil
2 cups unbleached all-purpose flour (divided)
1 cup whole wheat flour
1 teaspoon salt
Extra flour for your work surface
Instructions
Whisk together the water, sugar, yeast, and 1 tablespoon of the all-purpose flour in a mixing bowl. Let it sit for 15-20 minutes in a warm place until the mixture bubbles and gets spongey. If this never happened, it means the yeast is inactive. Discard the mixture and try again with another yeast packet.
Add the olive oil, 1 cup of the all-purpose flour, the whole wheat flour, and the salt and stir together. Slowly add the rest of the flour (and more if needed) until the proper bread texture is achieved.
What is “Proper Bread Texture?”
What does this mean? Well, it takes a few tries to get the feel for making bread, but you will know when you are done adding flour when the dough is no longer sticky. You shouldn’t need much more than the three cups that are specified in this recipe. It all depends on your climate! If you live in a humid location, you might need more flour. If it’s really dry in the air, you might need less.
Another way you will know that you are done adding flour is that the dough will start to come together. It will naturally form into a ball. As this happens, you will start to observe that the dough doesn’t stick to your hands as much.
Time to Knead the Dough
Once you get to this stage, it is time to knead the dough. Spread some flour on your work surface so that the dough doesn’t stick. Kneading is simply working the dough using the heal of your hand. Push down on the dough with the heel of your hand. Flip it over and push it down again. As you do this, you will start to notice that the dough is starting to tighten up and gain elasticity.
If the dough starts to get a little sticky, add a small amount of flour to get it back to a good dough texture. Maybe just 1 teaspoon of flour or so at a time, or less, depending on how sticky it is. You will want to knead the dough for about 10 minutes.
Let the Dough Rise
Brush a clean mixing bowl with olive oil or spray with cooking spray. Place the dough in the bowl. Brush the top with olive oil or spray with cooking spray. Cover with a towel or plastic wrap and let rise until double. This will take about two hours.
After the two hours is up, punch the dough down with your first and knead it again for five minutes. Form into a loaf shape (or more than one if you want smaller loaves). Spray a baking sheet with cooking spray and place the loaves on top. Let the loaves rise until doubled. This should take about an hour.
Preheat the oven to 400 Degrees Fahrenheit. Place the baking sheet in the center of the oven and bake the loaves until cooked all the way through. You will know they are cooked if you knock on the loaf with your fist and it sounds hollow. This should take about 40 minutes or so.
Remove the pan from the oven. Let the loaves cool on the pan about ten minutes. After that, remove them from the pan and let them cool on racks for at least thirty minutes before cutting.